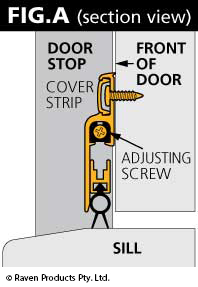
The RP60 is suitable for installation on single or double, inward opening doors.
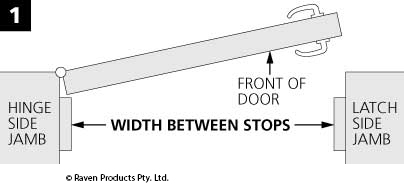
- Remove cover strip. With a hacksaw, cut RP60 at latch side squarely to width between stops less 2mm for clearance on latch side.
Note: If door is less than 750mm wide, trim equal amounts from each end to avoid mechanism damage. 450mm is the minimum operable size.
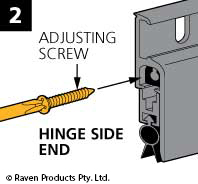
- Fit adjusting screw (the longest screw) by fully inserting in the hinge side end of RP60.
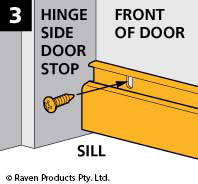
- With door closed, position RP60 level with door bottom and firm against hinge side stop.
Screw fix.
- Open door and withdraw adjusting screw two turns.
For soft timber, fit thumb tack strike.
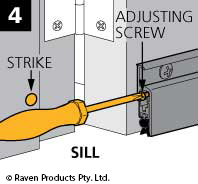
- Close door gently and observe action of RP60. Seal should engage sill lightly.
Note: If further adjustment is needed once installed, turn the adjusting screw half a turn at a time and test.
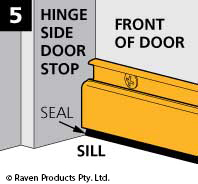
- Cut cover strip to width of RP60.
Fit cover strip in channel.
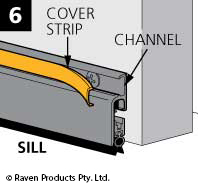
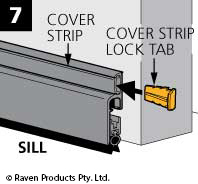
- Push in cover strip lock tabs at each end to hold cover strip. Tap in tabs flush with a small hammer.

- Remove cover strip. With a hacksaw, cut RP60 at latch side squarely to width between stops.
Note: If door is less than 750mm wide, trim equal amounts from each end to avoid mechanism damage. 450mm is the minimum operable size.

- Fit adjusting screw (the longest screw) by fully inserting in the hinge side end of RP60.

- With door closed, position RP60 level with door bottom and firm against hinge side stop.
Screw fix.

- Open door and withdraw adjusting screw two turns.
For soft timber, fit thumb tack strike.

- Close door gently and observe action of RP60. Seal should engage sill lightly.
Note: If further adjustment is needed once installed, turn the adjusting screw half a turn at a time and test.

- Cut cover strip to width of RP60.
Fit cover strip in channel.

- Push in cover strip lock tabs at each end to hold cover strip. Tap in tabs flush with a small hammer.


