
Screw On / Moulded Lip Fitting Instructions
For frequently asked questions such as "How to find your model number" or "How to measure your door seal", visit our FAQ's page.
These instructions suit seal profiles such as FD001, FD002, FD006, FD008, FC501, FC501 (3 side) and FC501 inside out
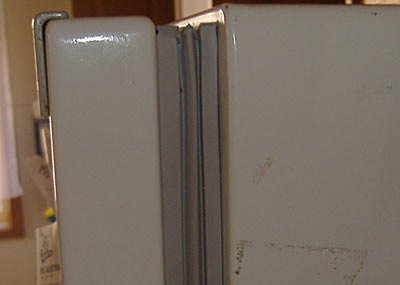
Whilst most fridges use a bracket with screws to hold in this type of seal some models (Hoover fridges especially) have a channel moulded into the door that fits the seal.
- Before we do anything we must check the size of the door seal is correct. The sizes are rarely incorrect, but it does save you the trouble of doing the job twice if you are unfortunate enough to receive the wrong door seal. Hold the new door seal up against the old door seal to compare the size or measure using a measuring tape.
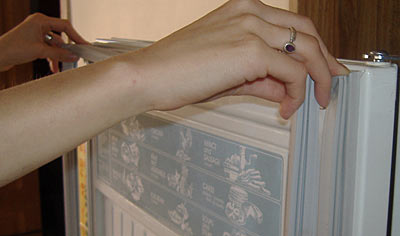
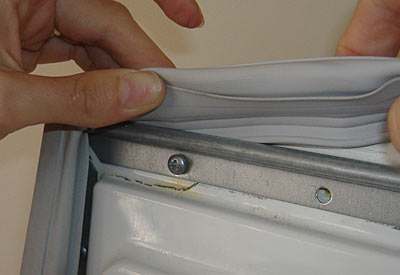
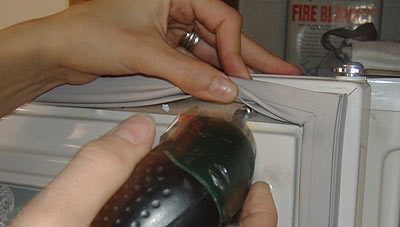
- Find the screws under the door seals which are holding in the plastic liner and door seal. Sometimes these screws hold in a small metal strip which goes around the door.
- Loosen the screws holding the door seal in around the door. Do not take the screws right out.
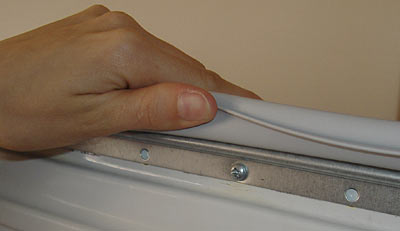
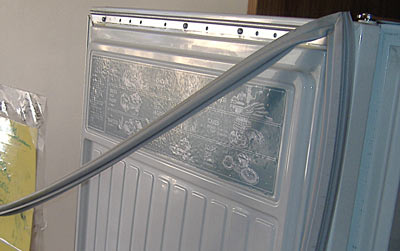
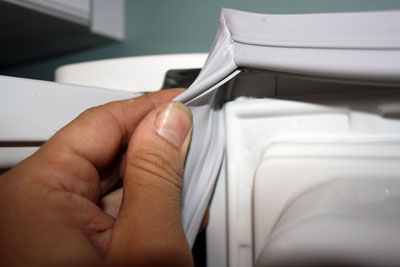
- Once all of the screws are loosened, the door seal should easily slide out from behind the plastic liner. Be careful not to be too forceful when doing this step as some plastic liners can be quite brittle and crumble if you are too rough with it. You can see that the seal is held in by the small lip behind the seal.
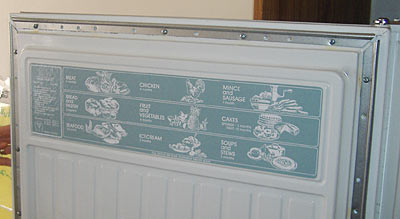
- Completely remove the old door seal, making your way around the entire door. Once the old seal is removed you may wish to clean the fridge before installing the new seal.
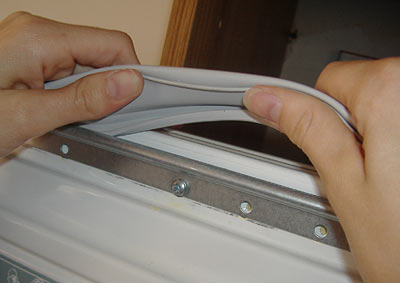
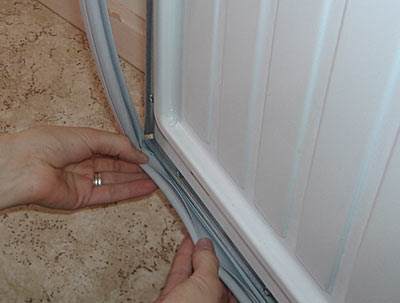
- Push the small lip of the door seal behind the metal plate or small plastic channel. Begin at the top to prevent the door seal falling whilst doing this. Note: for multi profile seals eg. FD002+FD015 place the side with no magnet on the hinge side of the door.
- Make your way around the entire door, until all of the door seal is pushed in by the small lip. **Be careful not to stretch the seal (see note at below)
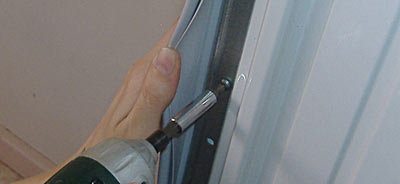
- Tighten the 4 bottom corner screws, and 4 top corner screws.
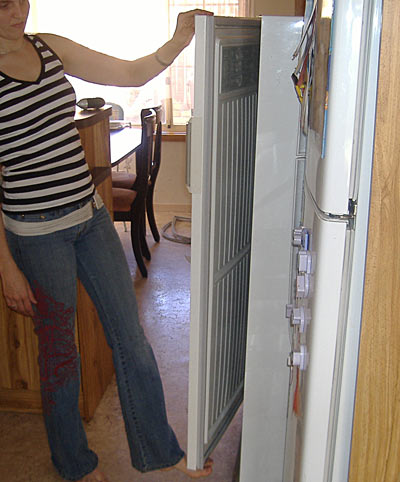
- Close the door, and inspect the door seal from the side. You should be able to tell whether the door has a twist as is shown in the photo. The door seal would either have a big gap up the top or the bottom of the opening side. This is quite common, as the screws which have just been removed are what holds the alignment of your door.
- If you found in the previous step that the door was twisted, then simply twist the door in the correct direction as shown here in the photo using your foot to lever it. Don't do this too hard as you don't want to break the plastic liner. Twist it a bit at a time, and then gently close the door to check the door as in step 8 until the door is aligned correctly.
- Tighten the rest of the screws. You are nearly finished, Continue to check the door as you go, to make sure that it doesn't twist as you do the job.
- All Done, you've now successfully installed your own door seal.
**Be careful not to stretch the seal during installation. If you do accidentily stretch the seal, dont worry it should return to its origional size.
Simply lay flat in a cool room for a few hours or overnight.

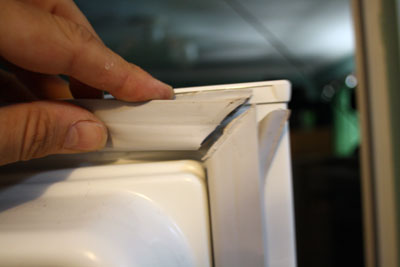
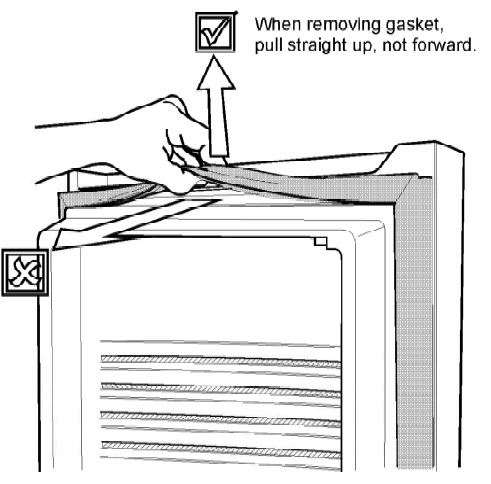
Firstly Peel the door seal out from behind the plastic liner. Sometimes this can be easy and other times difficult. Try to pull the entire flap that sits in the insulation right out, as it will make fititng the new seal easier.
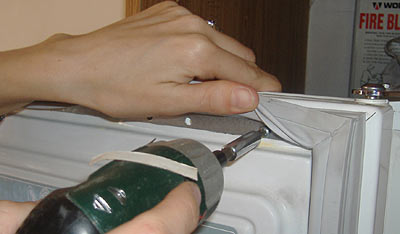
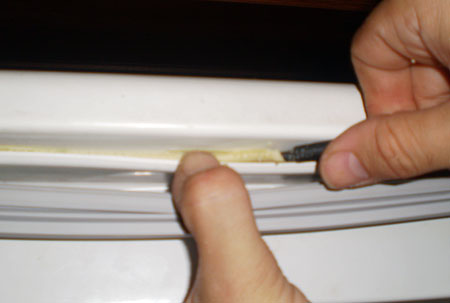
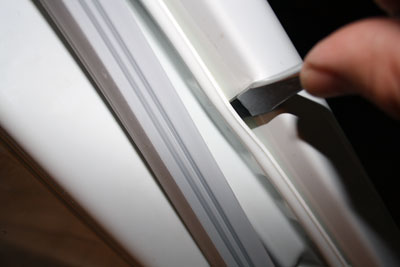
You may need to cut the old seal with a pair of scissors or blade as shown below to help you remove it from the fridge..
If you do not wish to cut your existing seal, you may be able to remove it like so
- Once the old seal is removed you may wish to clean the fridge before installing the new seal.
On some Hoover fridges, there may be an excess of insulation that should be removed to make room for the new seal.
Chip away the small lip of insulation just under the outer edge of the plastic liner. Using a combination of a stanley knife to cut it, and a small screwdriver to remove it does a good job.
If this is not removed then the new seal will not sit under the plastic liner very nicely, and will also make the job longer.
- Get the door seal to sit in the corner under the plastic liner by putting the small lip of the material underneath.
Once you have hooked it in, slide the lip down, so it sits nicely in the corner with the top part and side part underneath the corner. 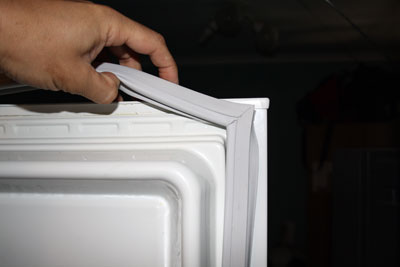
Repeat this with both top corners. Then attempt to push the lip underneath all of the upper side of the liner with the small lip.- In some areas it will be necessary to push the liner out a little with a screwdriver, to allow extra room to push the seals lip underneath.
- Once you have done this, your seal should be on quite nicely. There may be gaps which you can fix using our troubleshooting instructions.